
Placing and naming cameras
Where to put your 3ds Max cameras, how high, and how to name them so every render finds its place.
Spacing
Put a camera in every room, along hallways and in each doorway, about every 2–4 metres. Each camera should be able to see the next one, so the tour can glide between them.
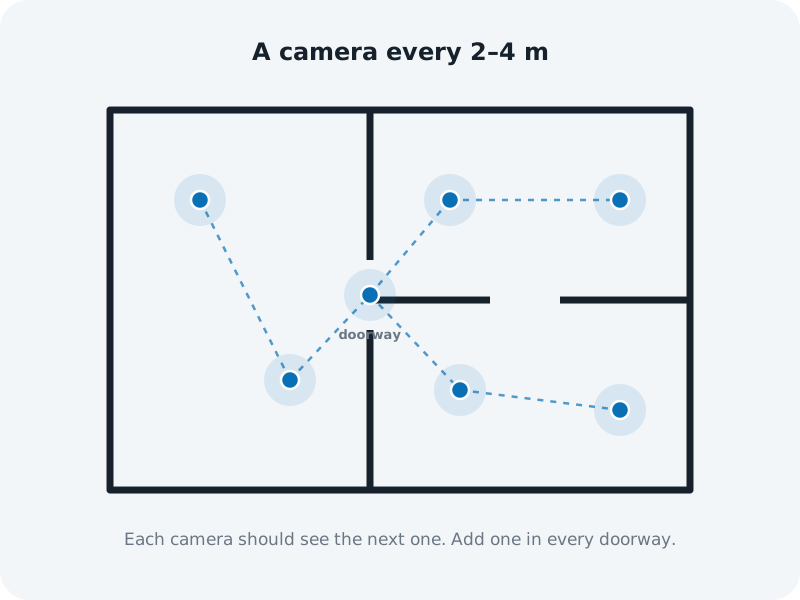
- More cameras make walking smoother. Most homes need 20 to 60.
- Hop and the glide when buyers stop only go to renders they can see from where they stand, so a camera in each doorway links the rooms either side.
- Add a camera anywhere you want buyers to stop and look, like a kitchen island or a view from the balcony.
Height
Set every camera about 1.6 m above its floor, and keep it level: no tilt and no roll. On upper floors, measure from that floor.
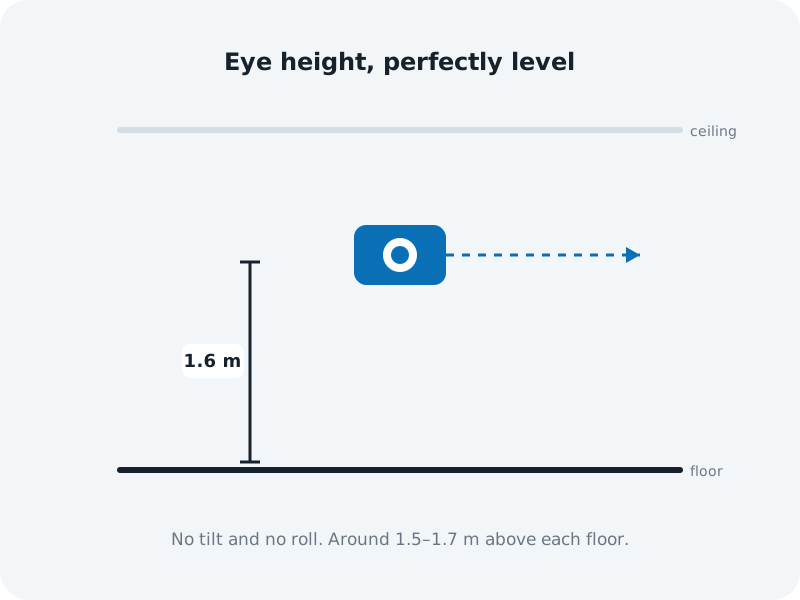
ArchviewVR finds your levels from camera heights. Cameras at the same height (within half a metre) on the same floor become one level, so keep each floor’s cameras at the same height. A camera or two on the stairs, between floors, is fine: they’re treated as stair views.
Tip: leave every camera facing the same way rather than turning each one. ArchviewVR works out which way each render faces by matching it to the model, and it’s most reliable when all the cameras share one heading.
Names
Each render is matched to its camera by name, so:
- Use short names with no spaces, like Cam_Kitchen_01. Use _ instead of a space.
- Name the render file exactly like its camera. Cam_Kitchen_01 renders to Cam_Kitchen_01.jpg.
- Keep every name different.
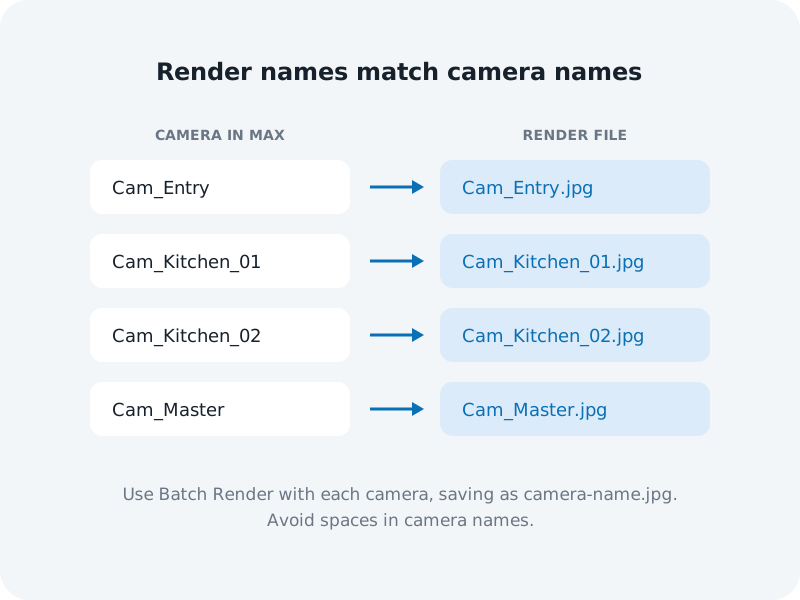
Capital letters don’t matter. If a render’s name has something extra, like Cam_Kitchen_01_final.jpg, it’s matched to the longest camera name it contains, but exact names are safest.
Warning: a camera name with spaces breaks the points file. The exporter warns you and offers Fix names, which swaps spaces for _. Rename those renders to match.
Put them on one layer
Keep your tour cameras on their own layer. The exporter can then select them all at once with Select layer. See Export with the ArchviewVR Exporter.