
Export with the ArchviewVR Exporter
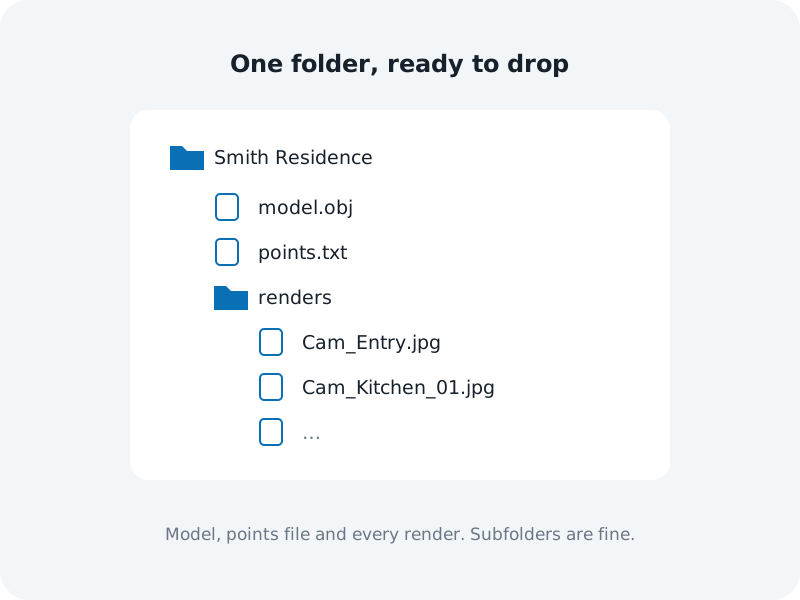
The exporter saves your camera points and proxy model into one folder, ready to drop into ArchviewVR.
Before you start
- Your cameras are on their own layer, each named exactly like the panorama rendered from it.
- You have a simplified model of the scene with the windows capped, under 150K polygons. See Making a simple proxy model.
Steps
- Download the exporter. On your projects page, press Download exporter. You only need to do this once.
- Run it. In 3ds Max choose Scripting › Run Script and pick archviewvr-exporter.ms. A small window opens with four steps.
- Choose a folder. It suggests an ArchviewVR folder next to your .max file. Press ... to pick another. Your renders go in this folder too.
- Select your cameras. Select them in the scene, or pick their layer from the list and press Select layer. The window shows how many are selected. If any names have spaces, press Fix names, then rename those renders to match. Press Save camera points.
- Select your model. Select the simplified model. The window shows its polygon count and warns you if it’s over 150K. Press Export model.
- Add your renders and upload. Copy your 360 renders into the folder. Press Open ArchviewVR, start a project and drop the whole folder in.
Tip: render names must match camera names. A camera called Kitchen_01 needs a render called Kitchen_01.jpg.
What it saves
| File | What’s in it |
|---|---|
| points.txt | One line per selected camera: its name and position. |
| model.obj | Only the objects you selected, not the whole scene. |
If something goes wrong
Warning: “No cameras selected yet”: the cameras may be hidden or frozen on their layer. Unhide them, then press Select layer again.
- “Too heavy”: the model is over 150K polygons. You can still export it, but the tour loads slower and may not work on phones. Delete hidden detail, furniture and anything outside the home first.
- “Export didn’t work”: export it yourself with File › Export › Export Selected, save it as model.obj in the same folder.
Was this helpful?