
Organising your folder
Put the model, the points file and every render in one folder so you can drop it into ArchviewVR in one go.
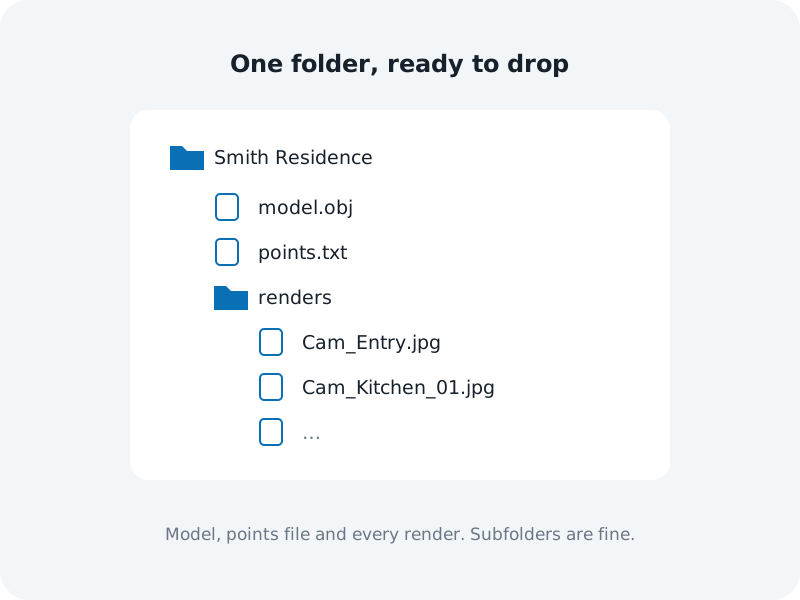
One folder, ready to drop
Put everything in one folder:
- The model: model.obj from the exporter (or a .glb or .gltf)
- The points file: points.txt from the exporter (or a .json)
- All the renders: JPG or PNG, each named like its camera
Subfolders are fine. You can keep the renders in their own folder inside it.
Keep it clean
ArchviewVR reads every file in the folder, including subfolders.
- One model only. If there’s more than one model file, only one is used, and it may not be the one you want.
- One points file only. Any .txt, .csv or .json file can be taken as the points file, so move notes, readme files and old exports out.
- Only tour renders. Other pictures, like textures, plans or test renders, show up marked × as not used. They do no harm, but they clutter the list.
Tip: the exporter suggests an ArchviewVR folder next to your .max file. Batch render straight into it so the folder is ready when the renders finish.
Check the names
Before you drop it in, check that every render has a camera with the same name in points.txt. Renders without a matching camera are marked × and left out. See Placing and naming cameras.
Drop it in
Start a project, then drag the whole folder onto the page, or press Choose folder. See Upload your folder.
Updating later
You don’t need the whole folder again for changes. Drop only the new or re-rendered files: same-named renders replace the saved ones, and a new model or points file replaces the old one. See Replace or add renders later.