
Check and fix flagged renders
Line up any render ArchviewVR isn’t sure about, then save the project.
After your folder is read, ArchviewVR lines each render up with the model. The check step shows anything it isn’t sure about, so you can fix it before saving.
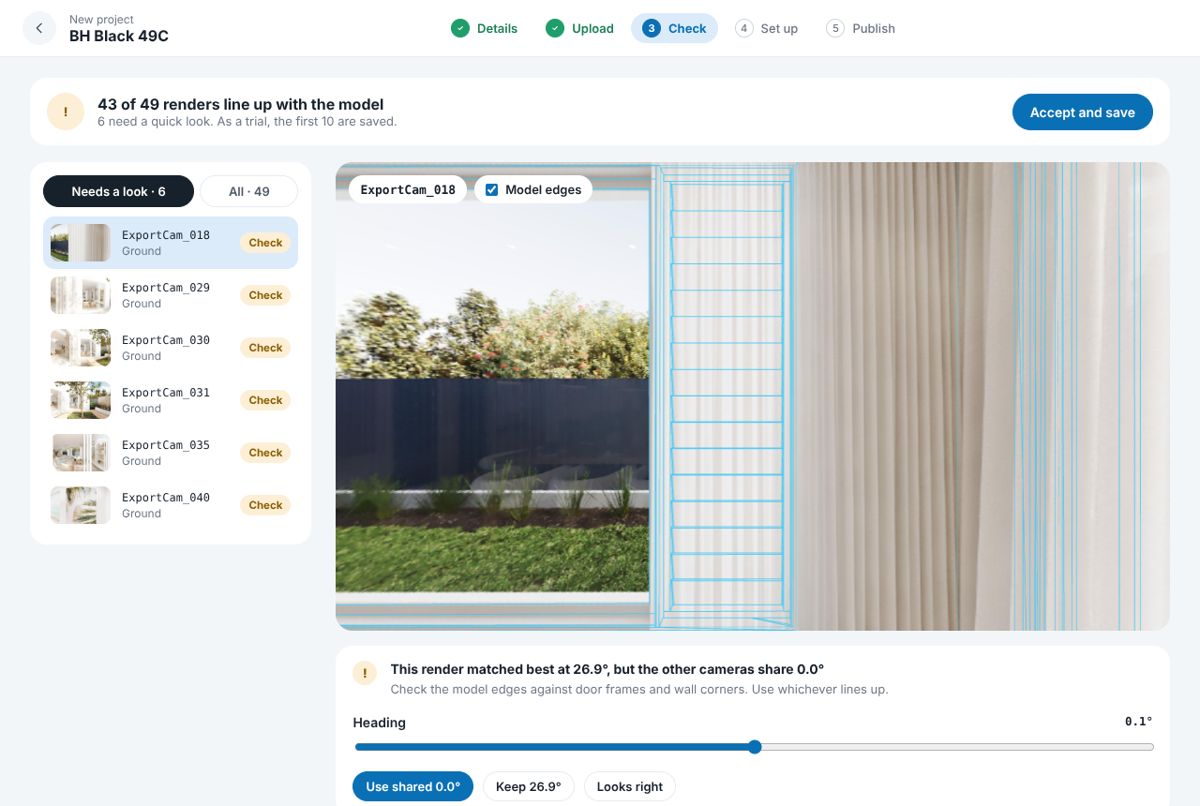
What you see
- The summary at the top, for example 12 of 13 renders line up with the model.
- The render list on the left, with two tabs: Needs a look and All. Each render shows its level and a label: Lined up, Check, Not used, or for updates Replaced or Kept.
- The view on the right, standing at the selected render with Model edges on. The edges are the outline of your proxy model drawn over the render.
Fix a flagged render
A render marked Check matched best at a different heading from your other cameras.
- Select it. It opens at that render with the model edges on top.
- Compare the lines. Look at door frames and wall corners. Do the edges sit on them?
- Pick a heading. Press Use shared to use the heading the other cameras share, or Keep to keep the one this render matched best. Each button shows its angle. If it already looks right, press Looks right.
- Or adjust it yourself. Drag the Heading slider until the edges line up.
Once you decide, it moves on to the next flagged render.
Tip: drag in the view to look around. Check a few directions, not just one wall.
Renders marked Not used
These can’t go in the tour. The panel says why:
- There’s no camera called … in the points file. Rename the render to match its camera, or export the points again, then drop the folder again. See Camera names don’t match.
- The image couldn’t be read. Save the render again as a JPEG or PNG.
Save
Press Accept and save. ArchviewVR uploads the renders and model, records the tour and takes you to the project page. Saving stops if the project would go over 500 MB.
On a trial project, only the first 10 renders are saved. The summary tells you when that applies.
If you’re updating a saved project, you also see Remove the … saved renders not in this drop. See Replace or add renders later.
Warning: if the edges don’t line up with any heading, the render’s position may be wrong rather than its heading. See A render doesn’t line up.